Quote of the Month...

“When I saw you, I fell in love, and you smiled because you knew” - Shakespeare

Tuesday, November 30, 2010

Please Take This Magnet and Stick It....

To your fridge that is. 

I've completed my second attempt at wedding related DIY projects and I have to say they turned out fabulously! Not to toot my own horn but BEEP-BA-BEEP-BA-BEEP! They were fantastically easy in addition to being fantastically inexpensive.


Aren't they adorable? We couldn't decide on just one picture for our cards so we decided to have three different ones! As we told our guests, if they don't like the one they get then they can just trade with someone else-like Pokemon cards.

I know you're all DYING to know how I made these things, and although it felt like it sucked the life out of me making them it really only took about 8 or 9 hours total to make 40ish cards. It just felt like longer because it was a little boring watching the Cricut cut, over and over again.


Watching Jeff Dunham's Christmas special made the Cricut cutting a little more bearable.


 Fishie Kitty supervised from his perch over by the Christmas tree that we'd just put up, which also makes the BEST kitty toy EVER!...


and FI Fishie vacuumed the apartment, or at least he pretended to.
Meanwhile I ran 45 photos through the Xyron machine to make them into magnets. Which, by the way, is easier said then done-you have to give enough space in between the photos otherwise you wind up with one photo on top of another and then you have to throw both photos out...not that it happened to me or anything, I've just heard it happens to other people-sometimes.


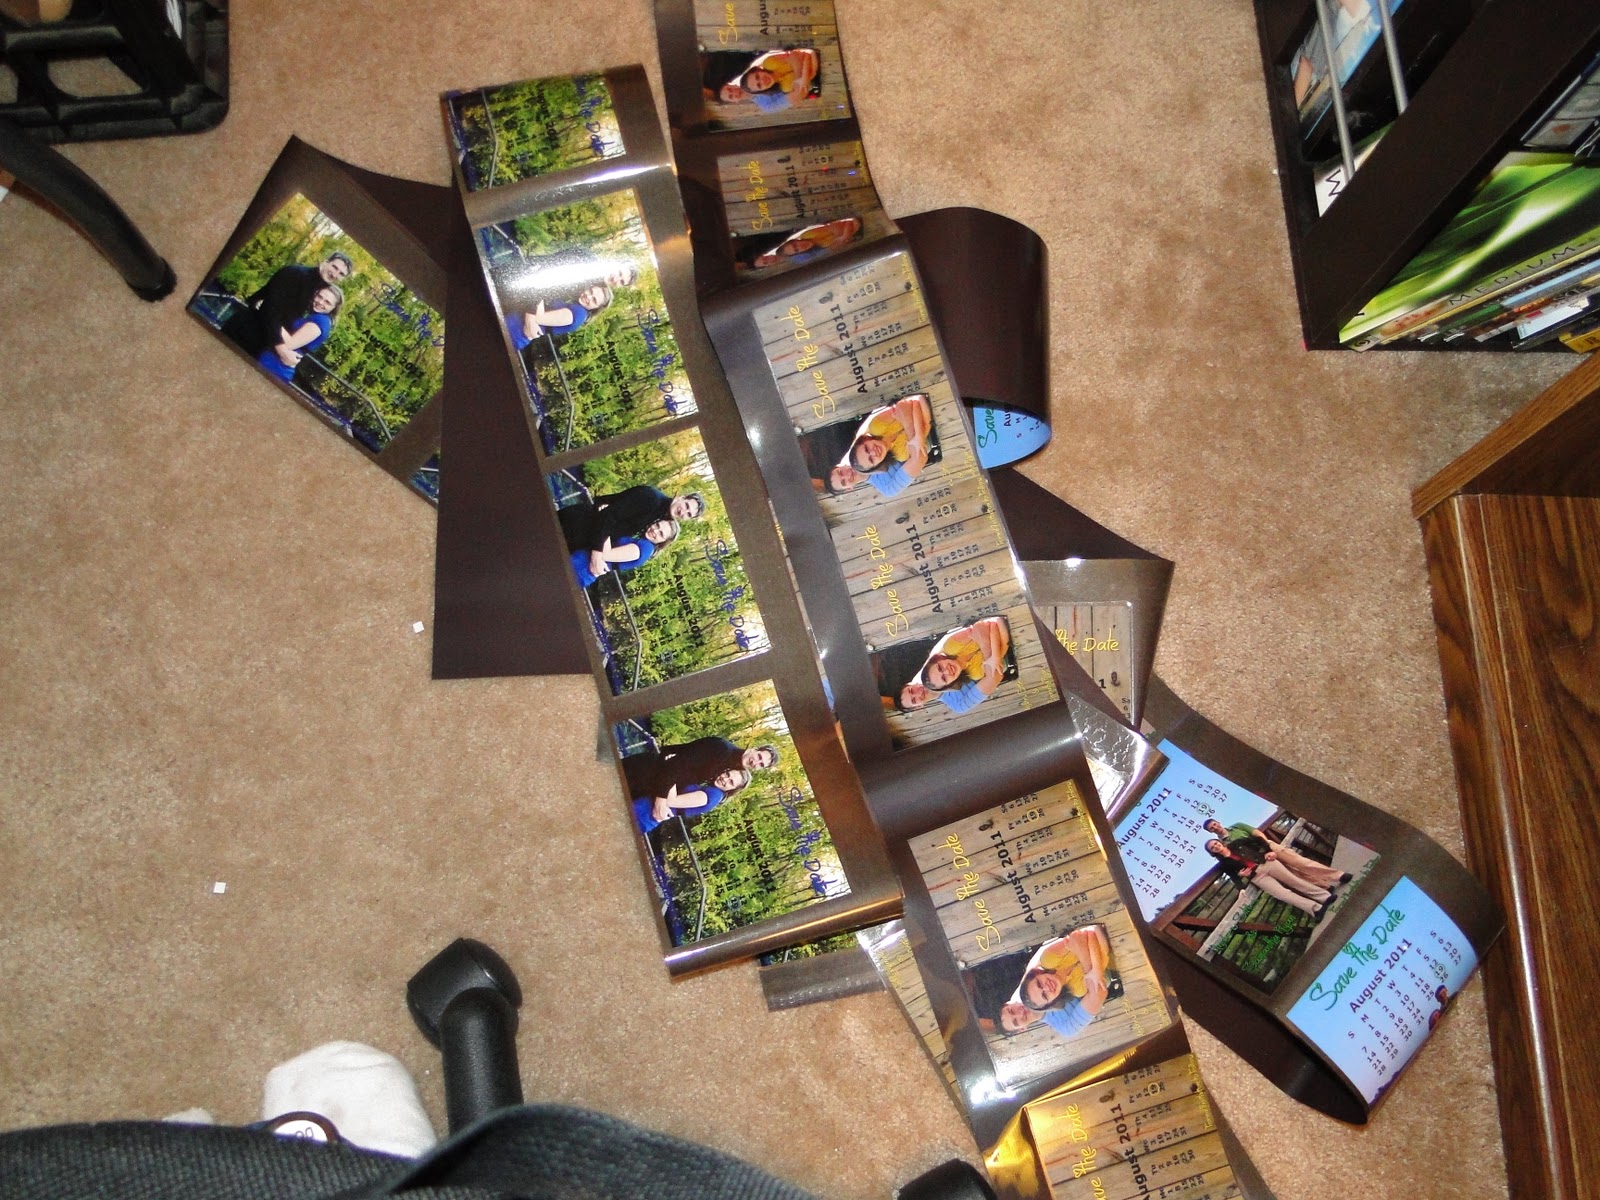
After I'd run about a million of them through the xyron machine and wound up with a nice little pile of magnets on the floor...


 It was time to cut them out...I tried using my straight paper cutter first but soon found that the rotary cutter I use for quilting worked MUCH better...

Even FI Fishie decided to help out, after his "vacuuming" of course.


Next it was time to babysit the Cricut and let it do it's thing...although it was boring sitting there watching it cut, I've gotten enough compliments on the cards that it was completely worth it.


 Being the indecisive bride that I am I couldn't decide on one photo or one color so we wound up using 3 different pictures with 4 different colors on the front...making for 12 different combinations.


 Another overlooked detail was the cute little polka dot edge that I meticulously hand punched out with a cute little punch I found at Michael's for 40% off.


We'd budgeted $200 for these cards and by mostly using supplies I already had on hand (xyron machine, hole punch, etc.) I was able to complete the project for a little over $100. The most expensive thing I bought was the refills for my Xyron Machine which were normally priced for $34.99 and I bought all of them on sale for 40% off.


Xyron Magnet Refills $89.65
Cardstock $3.98
White Cards $5.99
Photos $8.55
Total: $108.16


Did I make this project harder then it needed to be? Should I have just stuck with 1 photo and 1 color? 

Sunday, November 14, 2010

DIY Project Number Two...

Now that I've got one project under my belt I'm ready to begin tackling the million other ones I have left. First up...our Save The Date magnets.

We're going to keep this project super simple, have the picture printed at Wal-Mart's photo center run them through the Xyron machine to get the front side laminated and the back side gets the magnet. Easy peezy lemon squeezy.

Take a look at what I've managed to come up with using this wonderful free software called Photoscape and the way I look at it, it's like Photoshop for poor people.


What do you think? Are any of these good enough to be printed or should I just go back to the drawing board and come up with something else?

One Down...Only About A Thousand More To Go

 Remember when I showed off all the cool toys in my toybox? Well a few weeks ago I finally got a chance to play with them! I whipped out my little Cricut and created some "Will You Be My Bridesmaid?" cards. I wanted to wait until all of my bridesmaids had received their cards and given me their answer before I showed the project off. 


It's a pretty easy DIY project, mostly because I tried making it more complicated and just wound up getting frustrated and gave up after countless numbers of tries and failures. Finally I realized this was a simple project and I shouldn't dwell on it too much. Although it was difficult for me to give up and keep it simple I realized my sanity was more important then the fancy project I'd envisioned.


So how did I get from this...


 To this? 


Well it's elementary, my dear Watson...first I opened up my fabulous Cricut Design Studio


 I laid out the 3 dresses and one tuxedo I needed for my 3 bridesmaids and 1 bridesman on the screen and after several attempts and even more explicatives screamed at the Cricut I figured out the way the mat is laid out on the screen is not identical to the way it goes into the Cricut. And when I was using 8 1/2" x 11" paper on a 12" x 12" mat it was verrrry frustrating when the paper and the designs weren't perfectly matching up. 

When I finally got it to work...
the dresses came out beautifully...this just reinforced my love of the cricut (oh by the way, please ignore the date stamp on the photo-I forgot to reset the date on the camera I didn't make these cards last year before I was even engaged I promise) after I cut the dresses it was a matter of figuring out how to get them off the mat, which incurred more cursing and I almost needed a little liquid calm. But I did manage to get them off the mat and ready to be put on the cards...

 
 But I couldn't decide how to mount the dress onto the card...


So I looked through my stash of craft supplies and found my foam pop dots...score!!! 

Now the dress would be slightly above the card giving it the cool shadowy effect underneath.


But now I was confused as to how to incorporate "Will You Be My Bridesmaid?" onto the card since as you can see, the dress took up majority of the front of the card. Then I remembered I had this cute little font I'd downloaded from dafont.com called Jellyka-Love and Passion


A quick little type into the wonderful little Microsoft Word and I wound up with 4 neatly written "Will You Be My..." plaques for my cards... 2 bridesmaids, 1 maid of honor, and 1 bridesman. 


I added a couple more pop dots to the
back of the plaque and stuck it on the inside of the card.


After countless tries and fails, and finally four victories I wound up with some wonderful cards that I like to believe my bridesmaids will treasure for ever and for always.

The best part of the whole experience? I got a card from one of my bridesmaids with a simple word on the front...


I'm glad to finally have one DIY project checked off my list, the journey of a thousand projects begins with single one.

Monday, November 8, 2010

They're Here...

When you read that I like to imagine you're using the creepy voice from Poltergeist

 But this isn't about ghosts coming out of the TV, this is all about the wonderfully fabulous gift I got in the mail not too long ago. It arrived in a plain envelope just like any other piece of mail except for one teeny little detail...it was from Brianna over at Simply You! Photography you remember her, she was nice enough to follow us around like a paparazzi and snap our pictures a while back. Well, I'm happy to report that the Fishie engagement pictures are safely in my little hands and I'm pleased to share them with you.

LinkWithin

Related Posts with Thumbnails